
Why Make a Homemade Archery TargetÂ
You want to save money and have your target last for years. The archery enthusiast can build his own archery target for a great savings instead of paying more money for one that is already built from a local sports shop.
The do-it your selfer can build a good quality archery target that will last many seasons.
If you are not interested in building your own archery target, check out these foam archery targets on the market.
Cost and Time of Making Your Own Homemade Archery Target
Cost and time factors will be determined by which type of materials you use to build your archery target. The simplest archery target to build is a target made out of cardboard boxes. Which will take about 15 minutes to construct.
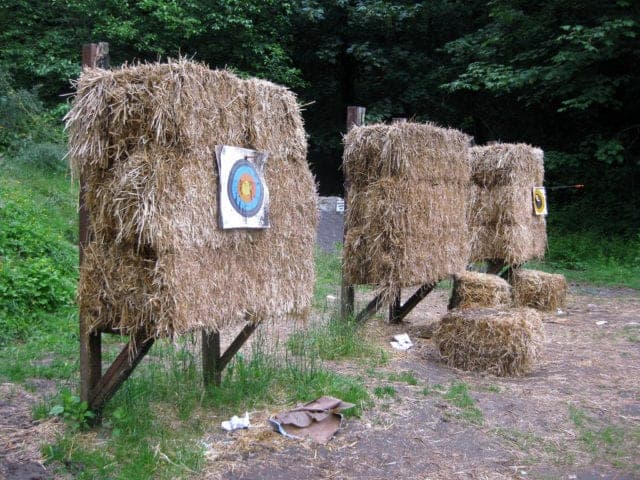
The Hay archery target will take about 30 minutes to build.

Wood archery targets will take about 3-4 hours to build. The cost for the cardboard target would virtually be about $3.00 per target.
You could pick up some recycle boxes from Home Depot, Lowe’s or one of those types of hardware stores for free. The cost for a hay bale starts at about $4.00 per bale and the cost of each hay target to build would be about $10.00. The wood targets range from $40-$50 to build per target.
Which are The Best Materials For Homemade Archery Target?
Using cardboard has the advantage of being the cheapest target you can build of all the homemade targets. You can get boxes from virtually anywhere like people discarding moving boxes for instance. You can pick up boxes from DIY stores such as Lowe’s, Home Depot, etc.
I understand that cardboard wears out rather quickly especially if the arrows are shot in the same specific area but still I believe the cardboard targets will last a long time.
Hay targets are relatively cheap to build and will last quite a while. I know that getting hay targets wet should be avoided because when the hay is wet it has to be re-dried and some of the hay’s efficiency is lost. This can be remedied by keeping the hay in a dry spot while storing. Field point arrows work fine with hay targets.
Wood targets are solid and will last a long time and seem to be able to take both field point and broad head arrows. The wood targets are more expensive to build then the other two types of targets. Wood will last for a very long time possibly a lifetime. Also, wood targets don’t have to be re-tightened periodically like some of the other targets need to be. But this is a minor setback because the other targets can be re-tightened very quickly.
You can actually use other materials like puzzle mat to make a archery target. The only limit is your imagination. This article from Instructables has layout a step by step guide on how to make a puzzle mat archery target.
You can also use carpet to make an archery target.
See the video below on how to make a target using leftover carpet.
Tools Needed to Build your Homemade Target
I would need these tools for building this particular wood target. Staple gun, squaring tool, a basic Porter Radial saw to cut the wood into the proper dimensions. I need the staple gun to staple the chicken wire to the wood frames. A hammer to bang all the wood parts into place. I won’t forget to add a jigsaw to the list.
Here’s a list of what tools you will need:
Let’s Build the Wood Archery Target
—————–
Step 1
Let’s drive over to the Hardware/Lumber store and buy the necessary supplies for the project ahead.
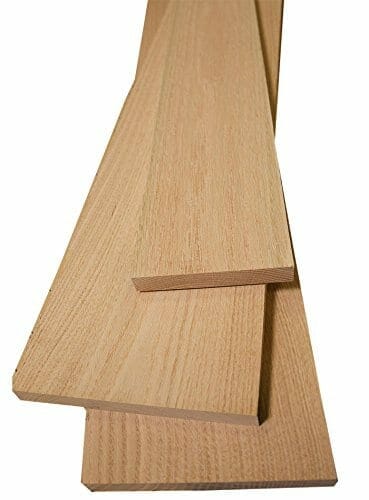
We will need to buy 2-8 ft. long 2×12 dry kiln boards, 2-8 ft. long 1×4’s, various sizes of wood screws and 3/8†staples.
Next stop will be the local farm where we will need to pick up some 36†chicken wire.
We have 2 options to either make the target 10 inches thick or 12 inches thick. The actual target will be 60’ high and the actual shooting surface will be 36â€x36â€.
Your shopping list:
- 2 x 8 ft. long 2×12 dry kiln boards
- 2 x 8 ft. long 1×4’s
- various sizes of wood screws
- 3/8†staples
- 36†chicken wire
Step 2
We’ll take our 2 2×12 foot boards and cut them both into 2 sections. One 3 feet long and the other 5 feet long.
Now we will take some Minwax and thoroughly cover the boards with 2 heavy coats. This treatment will give our boards a rustic look and protect the wood from the outside weather elements. Every 2 years we will treat the boards with the Minwax to keep them from drying out.
Step 3
Now we can cut the top hole in our boards so we can place the filling material into the boards. We picked the tightest-grained, densest boards we could find.
The Porter Radial saw will be the perfect tool to cut the hole. We will go ahead and mark the cut outs then cut them out with the saw. The corners will be cleaned up with a jigsaw.
Step 4
The frame will be constructed using the 2 five foot pieces for the sides and the 2 three foot pieces will make the top and bottom of the frame.
Using a squaring tool and clamps helps to make the frame square. The clamps are in place and now we will screw in 6†wood screws at all the intersection points of the wood around the frame.
Step 5
Now to get the chicken wire in place. Our chicken wire is 36†wide which makes it very easy to line it up around the 3 foot square frame.
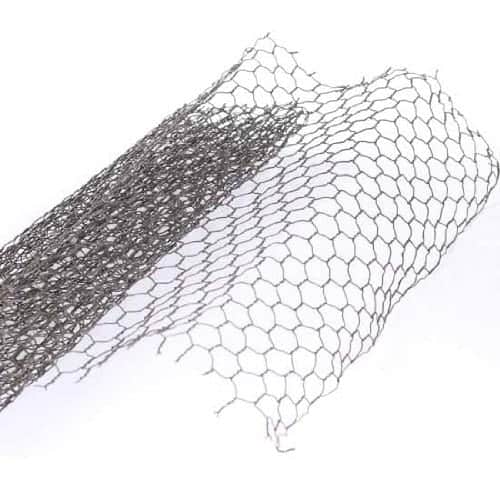
Using a generous amount of staples will help to secure the wire to the frame. It’s wise to put the chicken wire a lit bit over the frame.
We can staple plenty of staples on the front and around the sides of the frame to secure the wire securely to the frame. Some good whacks with the hammer will make the staples seat fully in place.
Step 6
Now it’s time to stuff our target with the arrow stopping materials.
Denim will be placed at the bottom of the target where the arrows won’t penetrate the target. Arrows are very hard to pull out of denim.
We can use old shirts and thinner materials to stuff at the top of the target. Arrows will come nicely out of these thinner materials. (Make sure all zippers buttons anything rough that can damage the arrows that are attached to the clothes are removed.)
When the layers build up alternate between stuffing and rolling the clothes to secure the densest packing you can.
Making rows with the clothes and then filling in the holes in the layers with cut up cloth should make for the best stopping material for the arrows. Note: It will take plenty of clothes to fill the target.
Step 7
We filled the target with clothing so now it’s time to put the front cover and frame on.
Black weed carrier ground cover should work well for our front cover. The front cover is tacked to the target with staples then we will get some 1×4’s and screw the frame over the cover. Once the target wears out it will be easy to pop off the screws and replace the front cover.
I saw a picture of a few arrows sticking in the target and they stopped 6â€- 8†in the target. The target serves its purpose well.
That is it the project is finished! The total project costs about $40.00 and it will take 3 hours to build.
Don’t Forget the Target Stand
The above target project has a stand already incorporated into the design. The two vertical pieces of wood set horizontally act as the stand for the target. This way you don’t have to build a separate stand and the target is elevated enough to shoot any type of arrows in the target.
Watch the video below and learn how to make a DIY archery target
https://www.youtube.com/watch?v=-1q6PrL2k4E
Sum it Up
The Bottom line is you can build any one of these three types of targets. It depends on how much work you want to put into your homemade archery target. Also how much money you want to invest is another consideration.
It’s well worth the effort to build your own Archery target for a reasonable cost. You will also get long term enjoyment out of it. Pat yourself on the back you have just built your own archery target!